A Beginners Guide to Chain Stitch Embroidery
If you’re brand new to hand embroidery, the chain stitch is one of those fun, confidence-boosting stitches that looks way more complicated than it actually is. Once you get the hang of it, you’ll be able to create beautiful outlines, bold borders, swooping lettering, pretty vines, and even fill in shapes with a soft, textured look.
I love teaching this stitch because it’s one of those “aha!” moments—suddenly your thread forms these perfect little loops, and it just clicks. In this guide, I’ll walk you through the chain stitch step by step, explain what to expect as you practice, and give you a few simple tips to help your stitches look neat and consistent. By the time you reach the end, you’ll feel ready to add this classic, versatile stitch to all your embroidery projects.
Save to Pinterest for later reading
Affiliate links may be used in this post, and if so, I will receive a commission at no extra cost. I’m also part of the Amazon Affiliate (Associate) program, where I earn a commission from sales made through my affiliate links. Read the full disclosure policy.
Step-by-Step Tutorial with Pictures
What You’ll Need
- Fabric (cotton or linen is easiest to start with)
- Embroidery hoop
- Embroidery floss (any color)
- Embroidery needle
- Small scissors
- A pen or pencil to lightly draw your line (optional)
Step 1: Prep Your Needle and Hoop
- Cut a length of embroidery floss about 18–24 inches long (any longer and it tends to tangle).
- Separate your floss into strands if you want a thinner line (most people use 2–3 strands for chain stitch).
- Thread your needle and tie a small knot at the end of the floss.
- Place your fabric in the hoop, pulling it snug like the top of a drum.
Step 2: Bring the Needle Up at the Starting Point
- Decide where you want your chain stitch to start (the beginning of your line or shape).
- From the back of the fabric, bring your needle up to the front at that starting point.
- Pull the thread all the way through until the knot catches on the back.
You’re now ready to make your very first chain.
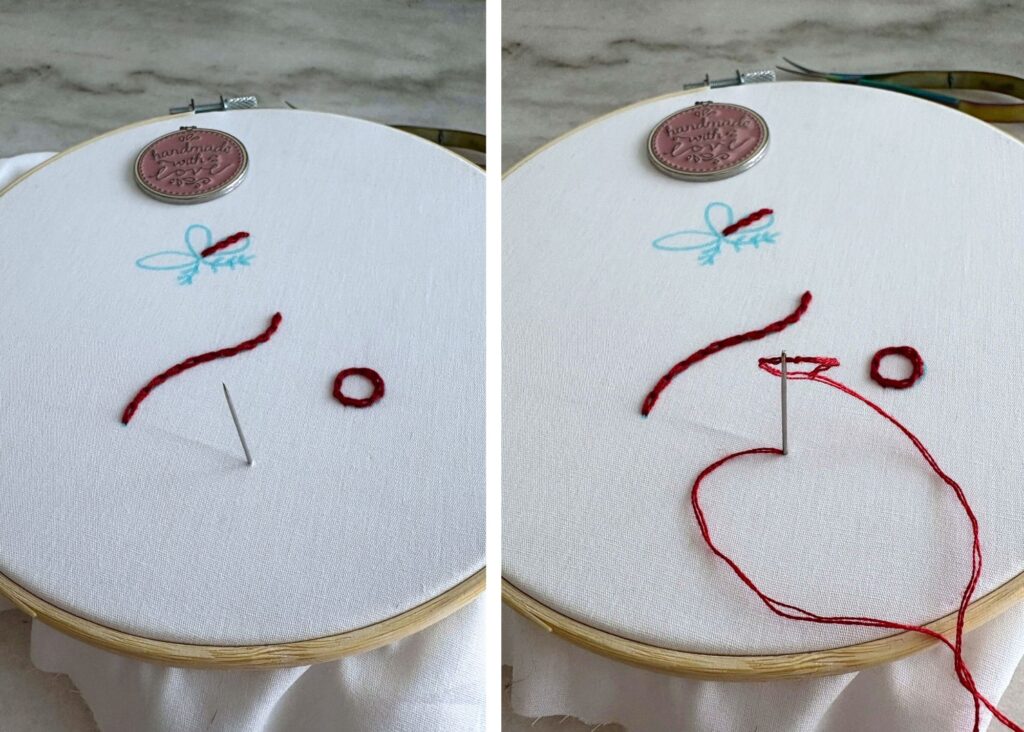
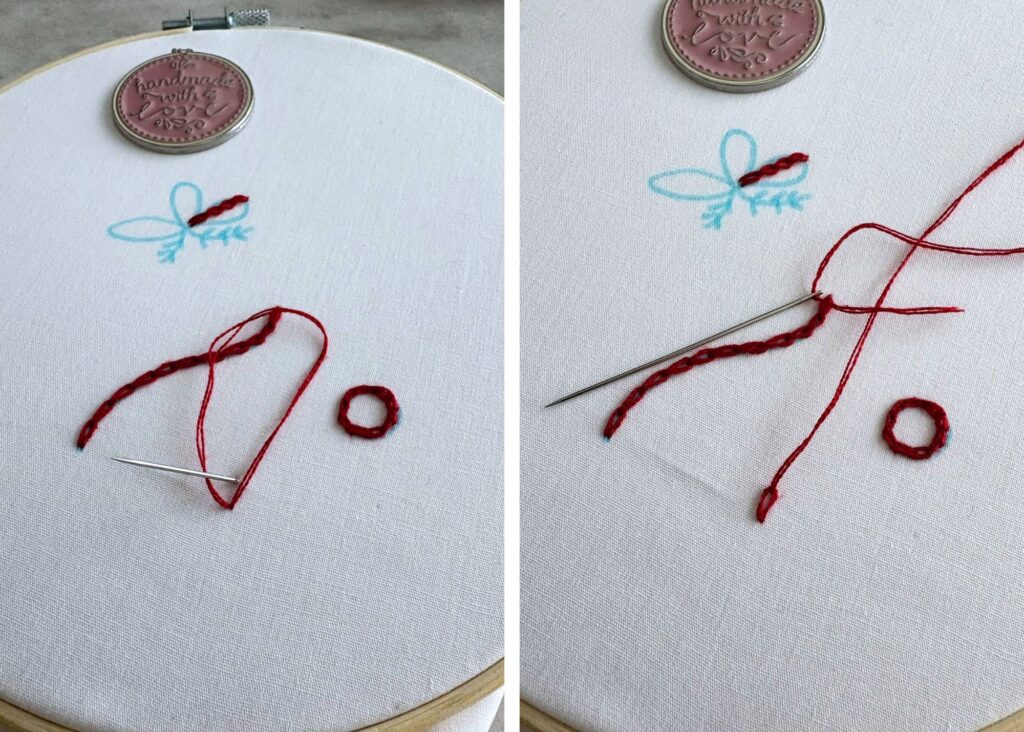
Step 3: Make the First Chain Loop
- Insert your needle back into the same hole (or just a hair’s breadth next to it) where the thread came up.
- Don’t pull it tight all the way through—leave the needle still on the backside of the fabric.
- Bring the needle back up a short distance ahead along your line (this will be the length of your chain stitch).
- Important: As you bring the needle up, make sure your working thread (the floss coming from the knot) is looped under the tip of the needle.
When you pull the needle through, the thread will catch under it and form a neat little loop—your first chain stitch!
Step 4: Tighten and Adjust the Loop
- Gently pull the thread until the loop sits flat against the fabric.
- Don’t yank it tight—if you pull too hard, the loop will shrink or disappear into the fabric.
- You want the loop to look like a tiny “link” in a chain: smooth, even, and resting nicely on the line you’re stitching.
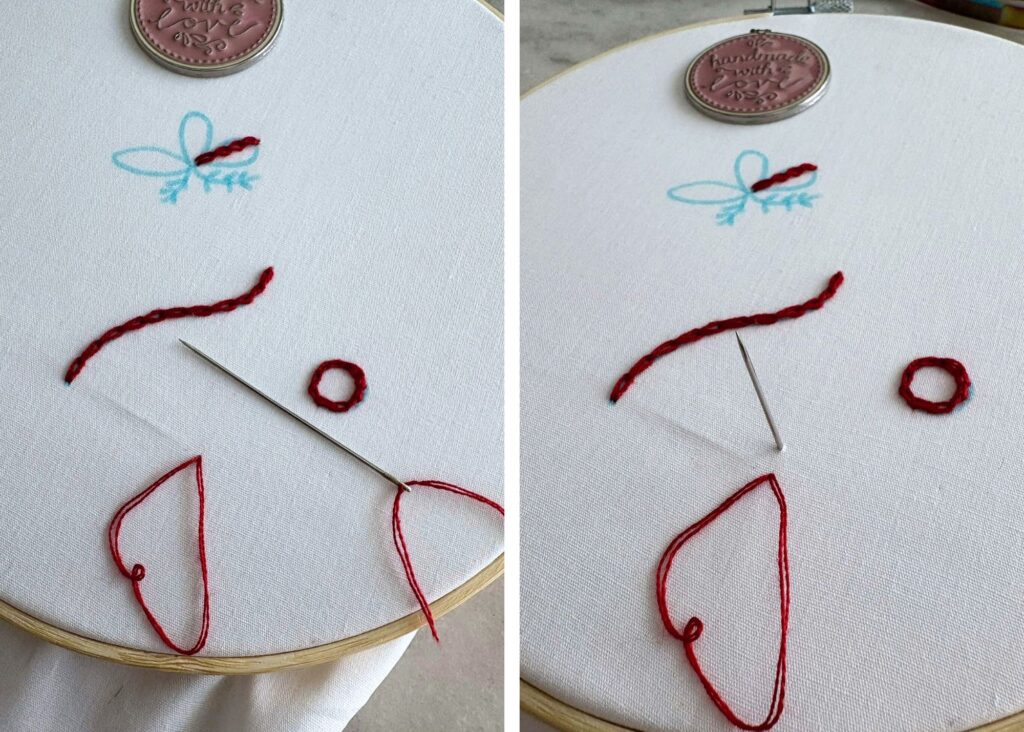
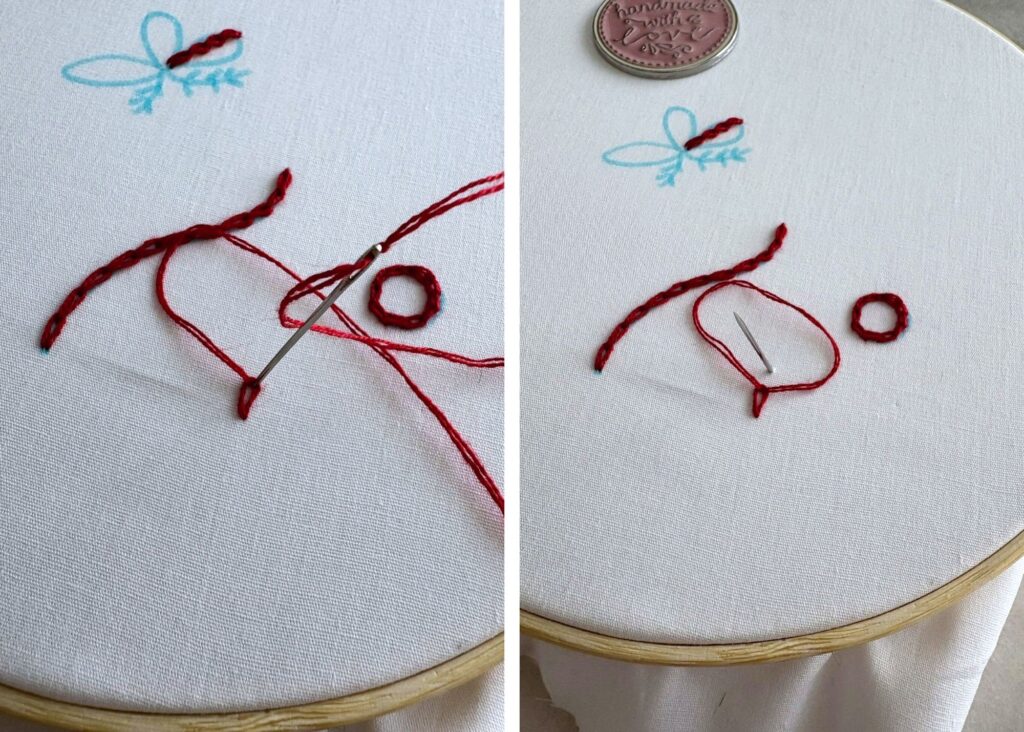
Step 5: Create the Next Chain Stitch
Now you’re just repeating the same motion:
- Insert the needle inside the tip of the previous loop, right at the point where it ends.
- Push the needle down through the fabric and come back up a short distance ahead along your line, just like before.
- Make sure your working thread is again under the needle as you bring it up.
- Pull through gently to form the next loop, snugging it up so it sits right against the previous one.
You’ll see your “chain” starting to grow link by link.
Step 6: Continue the Chain Along Your Line
- Keep repeating:
- Down through the end of the last loop
- Up ahead on the line
- Thread under the needle
- Gently pull to form another loop
- Try to keep your stitch lengths consistent so the chain looks even.
- Follow your drawn line or shape as your guide (curves look especially pretty in chain stitch).
Take your time—this is a very rhythmic stitch once you get going.
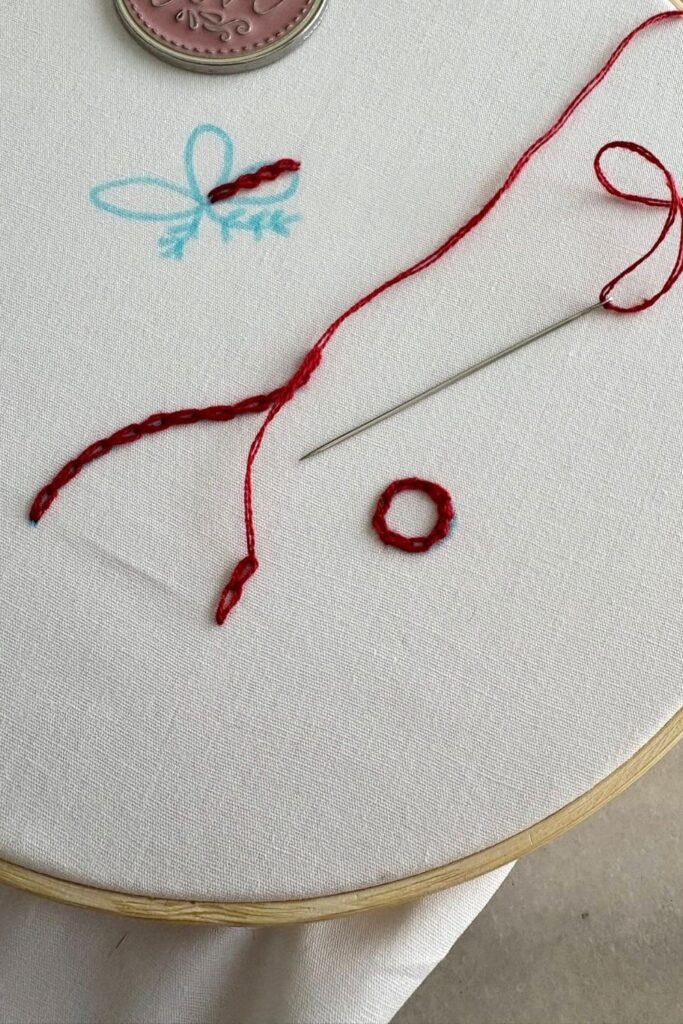
Step 7: How to End the Chain Stitch (Anchor the Last Loop)
When you’re ready to stop:
- Make your final loop just like the others.
- Instead of coming up again with the needle, bring the needle down just outside the tip of that last loop, on the other side of it.
- Pull the thread through completely—this “anchors” the last loop so it doesn’t come undone.
On the front, you’ll see a neat line of chain links with the last one secured by a tiny straight stitch.
Step 8: Secure the Thread on the Back
- Turn your hoop to the back side of the fabric.
- Slip your needle under a few existing stitches on the back to “weave” the thread through.
- Pull snug, then trim off the extra thread.
- If you like, you can make a small knot under the stitched area for extra security.
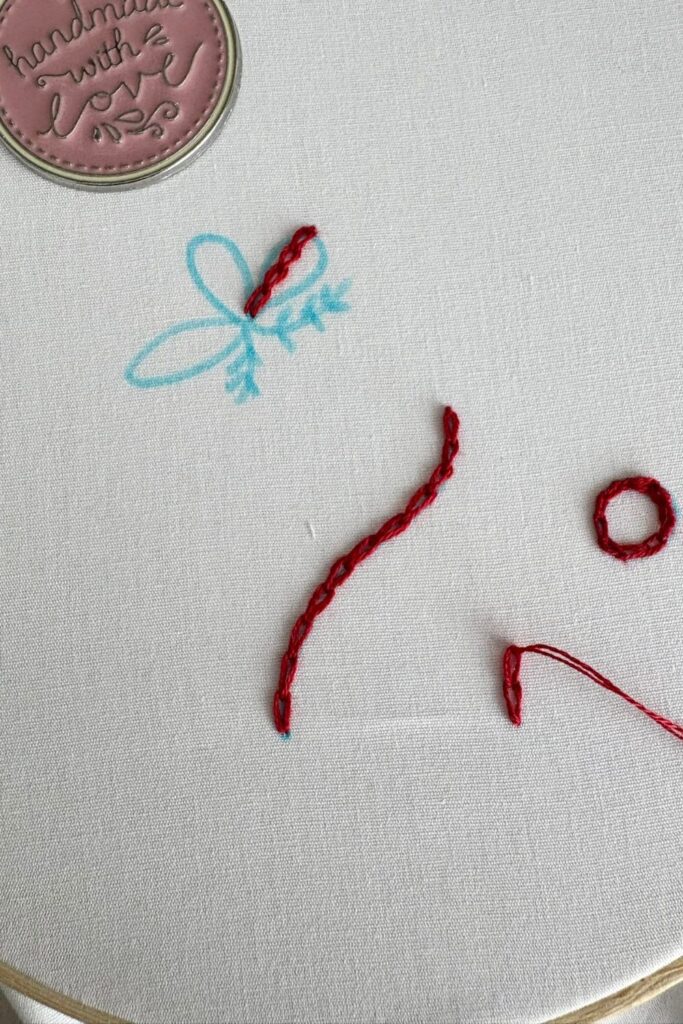
Your chain stitch line is finished!
Tips for Neat Chain Stitches
- Keep stitch length consistent: Aim for each loop to be about the same size so your chain looks uniform.
- Mind your tension: Too tight and the loops will pucker; too loose and they’ll look floppy. Aim for “snug but relaxed.”
- Practice on scrap fabric first: Do a few rows before stitching on a real project.
- Great uses: Chain stitch works beautifully for lettering, borders, floral stems, vines, and filling in shapes with a textured look.
Wrapping it up
Learning the chain stitch is one of those beginner embroidery moments that feels so satisfying once it clicks. With just a little practice, you’ll start to notice your loops becoming more even, your tension easier to control, and your lines looking smoother and more polished.
The beauty of this stitch is how versatile it is—once you master the basics, you can use it for lettering, borders, florals, outlines, and even textured fills. So don’t rush it, enjoy the rhythm of each loop, and let yourself settle into the process.
Every stitch you make helps you grow your skills and confidence, and before long, the chain stitch will become one of your go-to favorites in your embroidery toolkit.